Aldras is a powerful and versatile computer automation tool. Accelerate mindless repetitive tasks to focus your valuable time on what matters most.
Aldras is designed to be easy to use and automate basic processes in minutes. This documentation is here to help answer any questions you might have throughout your more advanced workflow acceleration efforts.
Download the Windows installer.
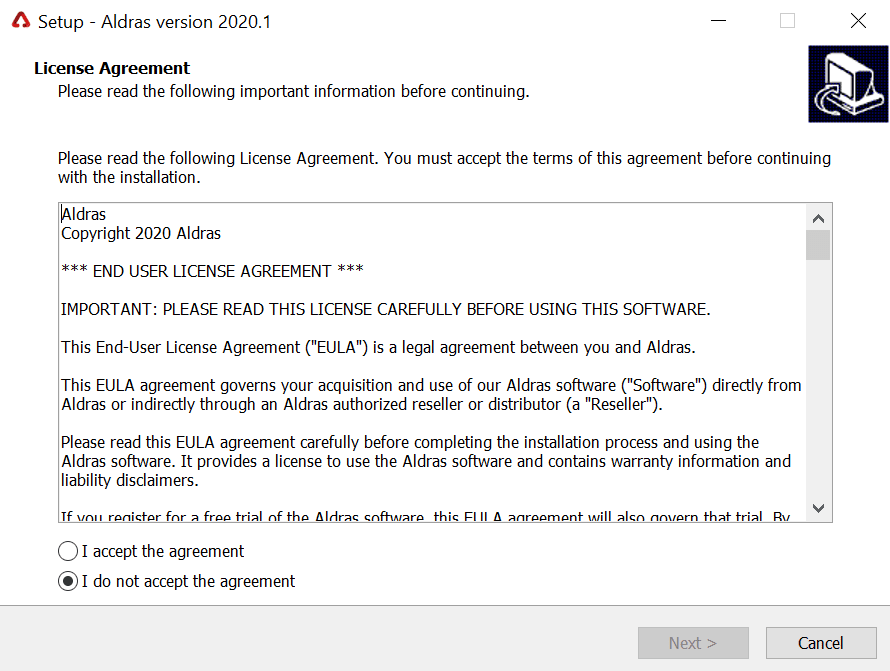
Run the installer and continue and complete the installation with your desired options.
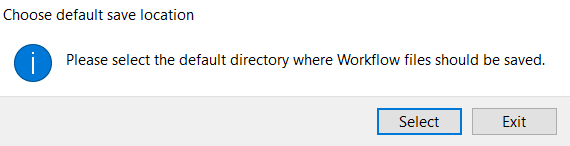
Launch Aldras for the first time. You will be prompted to select a default folder where you would like to save your workflow automation files.
That's it! You're all set to start automating your workflows! See the Getting Started section for more.
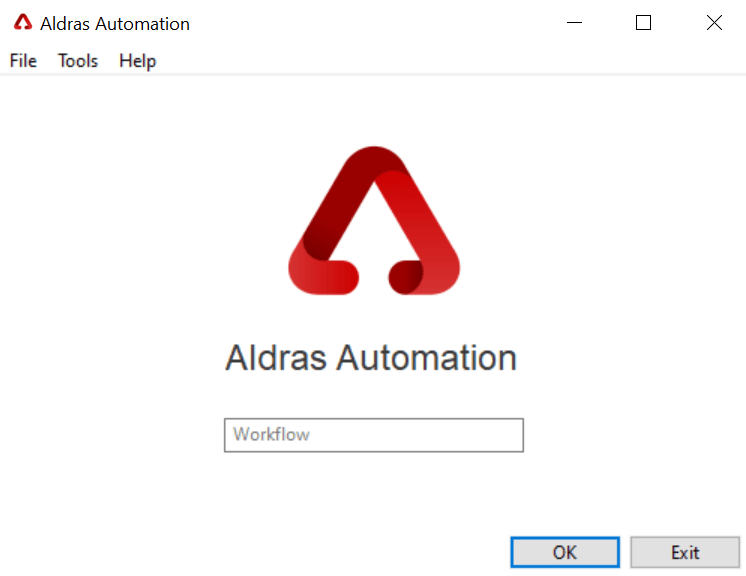
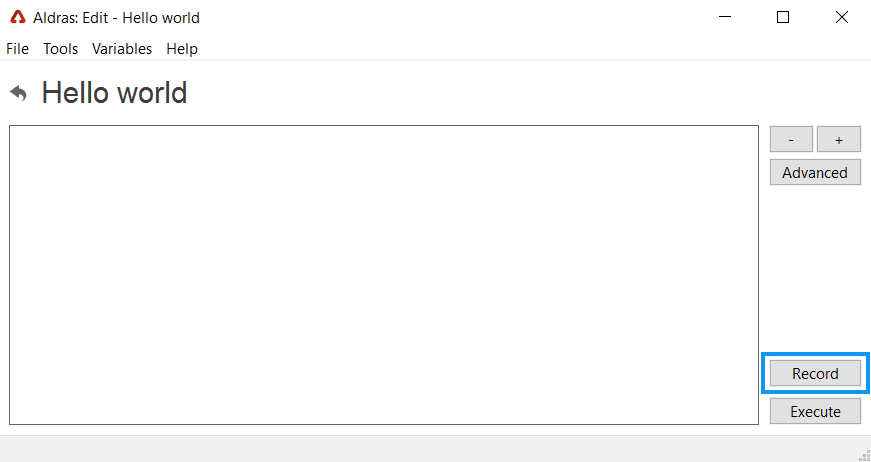
Enter a name for your workflow and click 'OK'.
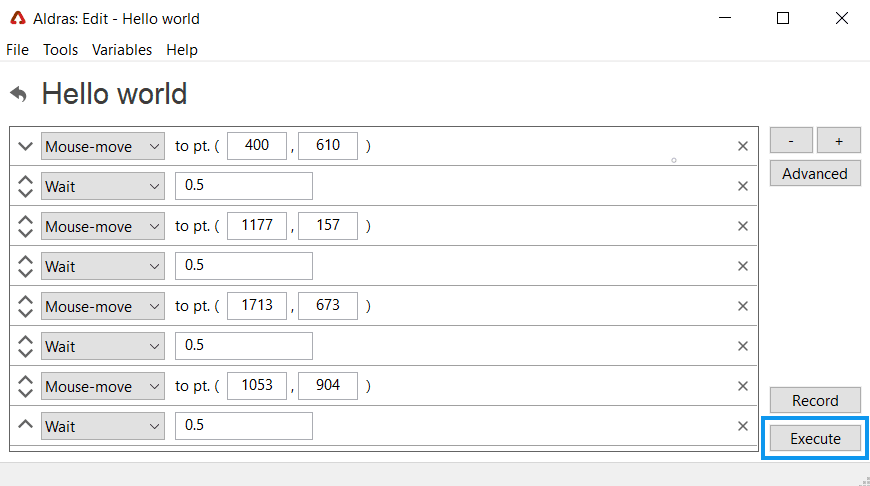
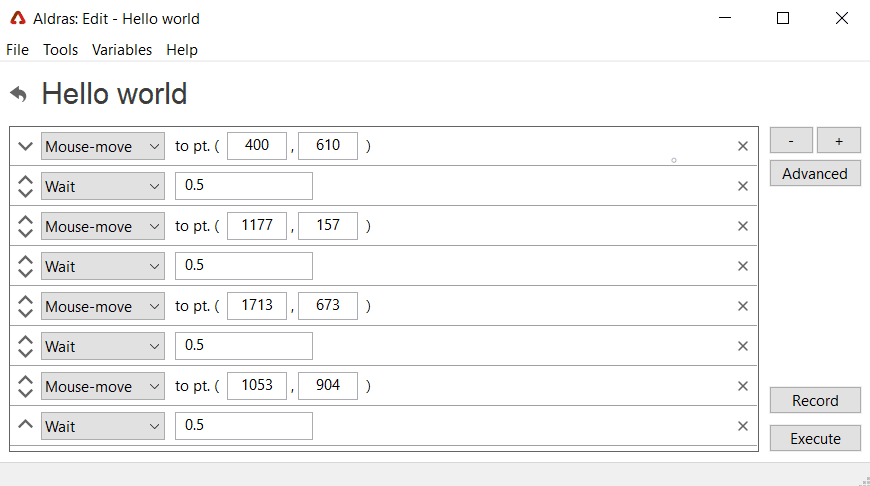
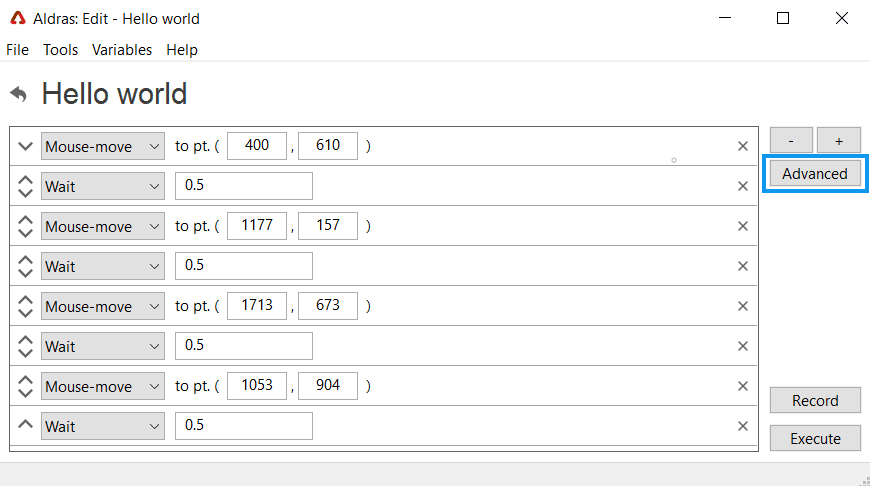
This will open the Edit window where all your commands will go. Click 'Record'.
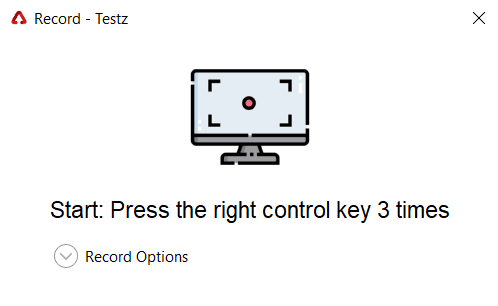
Press the right CTRL key three times to start recording your actions.
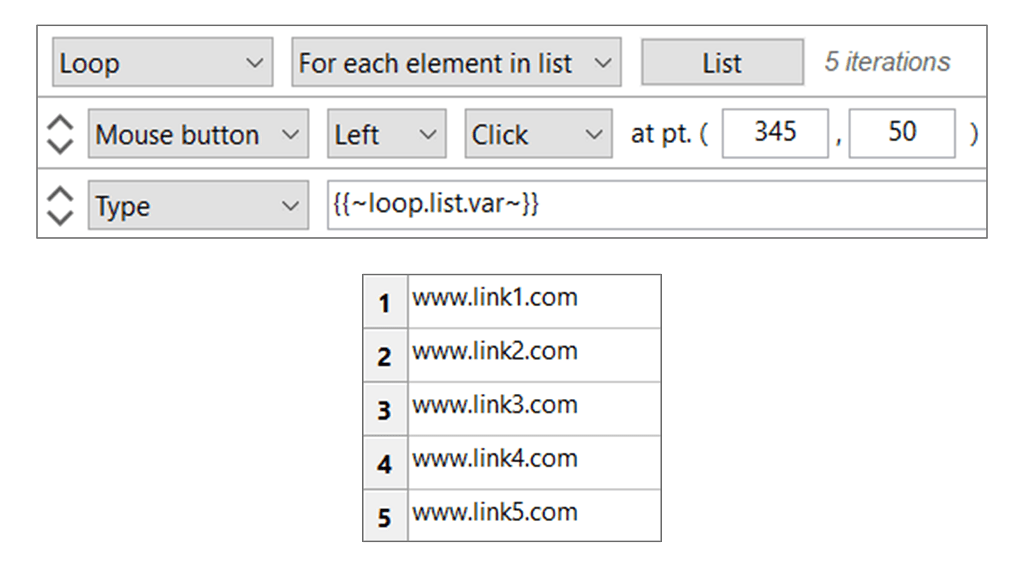
Press the left CTRL key once to record the position of your cursor without a click. Then move your mouse to a different position and press the left CTRL key again. Repeat a few times as you desire.
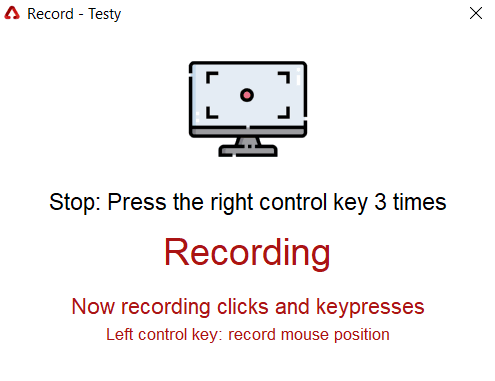
Press right CTRL key three times again to stop recording and click 'Finish'.
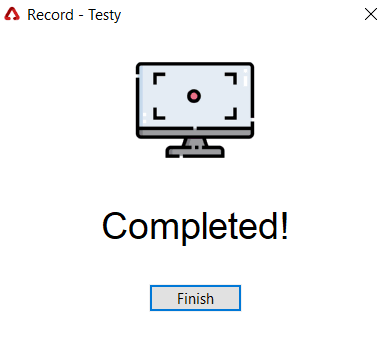
This will return you to the Edit window where you can see the actions you just recorded. Click 'Execute'.
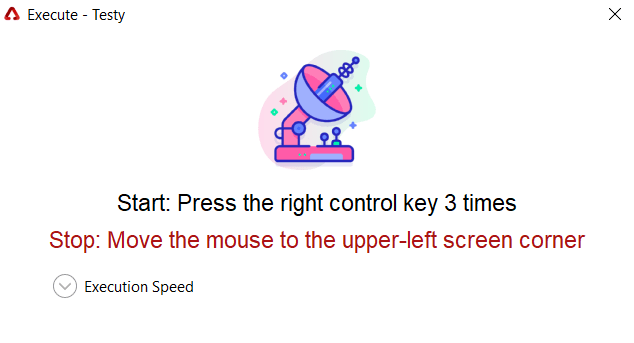
Press the right CTRL key three times to start executing your commands.
Adapt and change as you desire! All the actions you recorded are editable and you can add new commands with the '+' button.
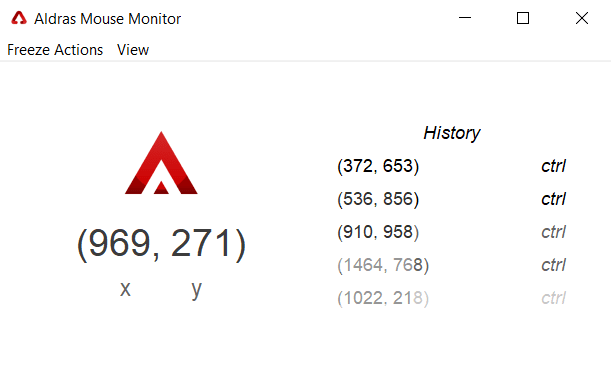
The mouse monitor tool is located under Tools > Mouse Monitor in the menu bar and can help you identify mouse coordinates without recording.
Open the record dialog then tap the right CTRL key three times to start or stop recording.
To record the mouse position - for example, to hover over something - simply tap the left CTRL key once while the mouse cursor is stationary.

Open the execution dialog then tap the right CTRL key three times to start workflow execution.
To cancel workflow execution, move the mouse cursor to the upper left corner of your display(s).

| Button | |
| Action | |
| x-coordinate | |
| y-coordinate |
Tap the left mouse-button (left-click) at the point (10,10)

| Text to type |
Type "Hello, this is some text with 44 characters!"

| Wait time |
Wait for 30 seconds for page to load or other process to complete before proceeding

| Special key | |
| Action |
Tap the Tab key

| Function key | |
| Action |
Tap the F5 key

| Media key | |
| Action |
Tap the VolumeMute key

| Hotkey 1 | |
| Hotkey 2 | |
| ... | ... |
Execute the Ctrl + Alt + Del hotkey

| x-coordinate | |
| y-coordinate |
Move the mouse cursor to the point (10,10)

| x-coordinate | |
| y-coordinate |
Double-click at the point (10,10)

| x-coordinate | |
| y-coordinate |
Triple-click at the point (10,10)

| Comment value |
Comments are descriptive and are not executed.
Comment "Fill out customer details"

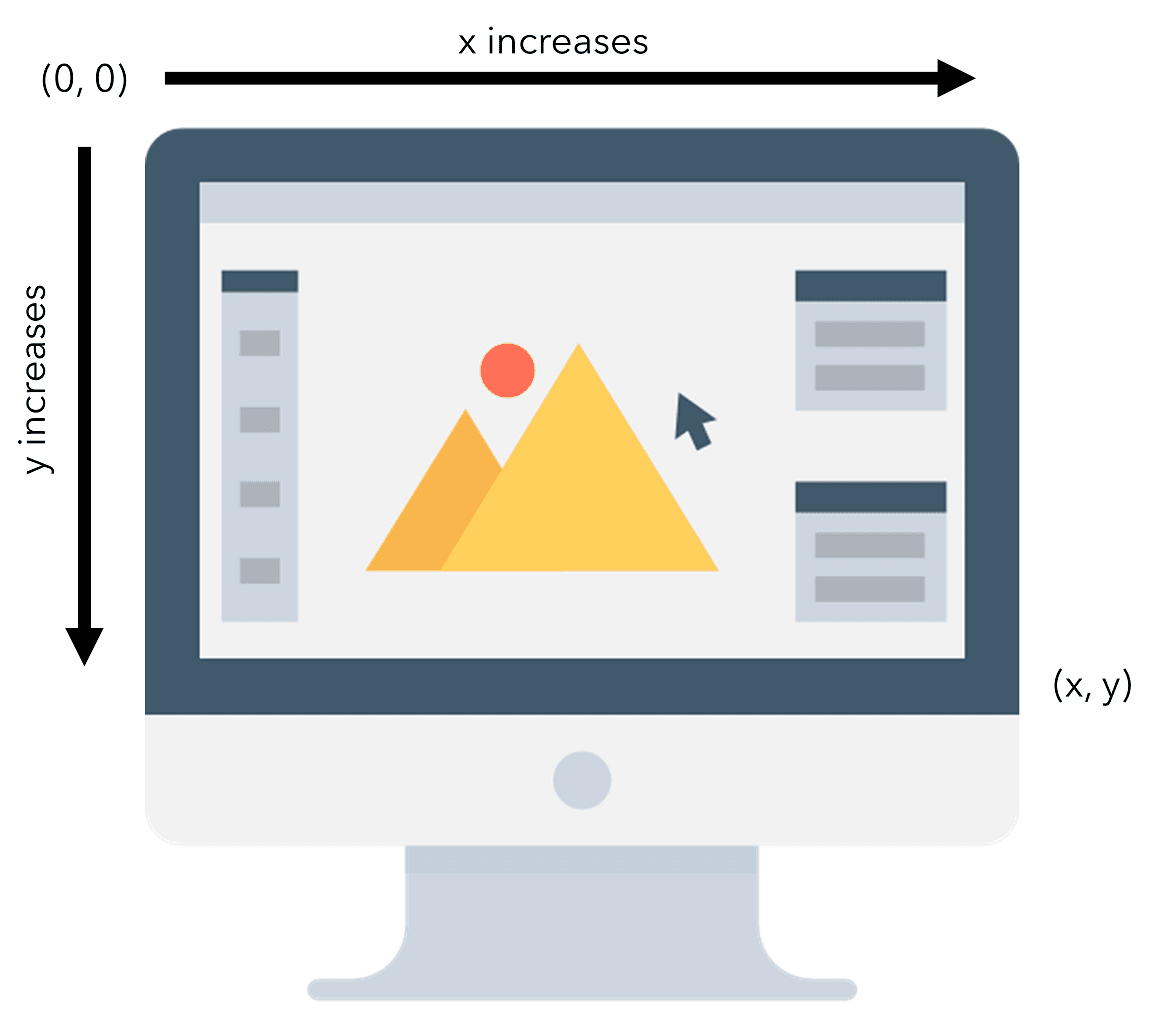
The mouse commands use x and y coordinates. x and y are both zero at the upper left corner of the screen(s). x increases as the cursor moves to the right and y increases as the cursor moves down. Note that mouse commands are inherently less reliable than keyboard shortcuts.
Professional and Business Aldras plans include the ability to edit the raw text of commands in a text-based editor. This allows for easier manipulation of multiple commands as well as greater customization.
The Advanced Editor can be accessed easily from the Edit window.
Aldras aims to lower the skill floor for software automation and allow anyone to save hours on monotonous tasks. Even so, there is still a learning curve to set up the workflows that will work for months or years.
As you learn what Aldras can do and how it can accelerate your work, make use of this documentation as well as the video tutorials.
Your plan may also include phone support, in which case you may give us a call as well.